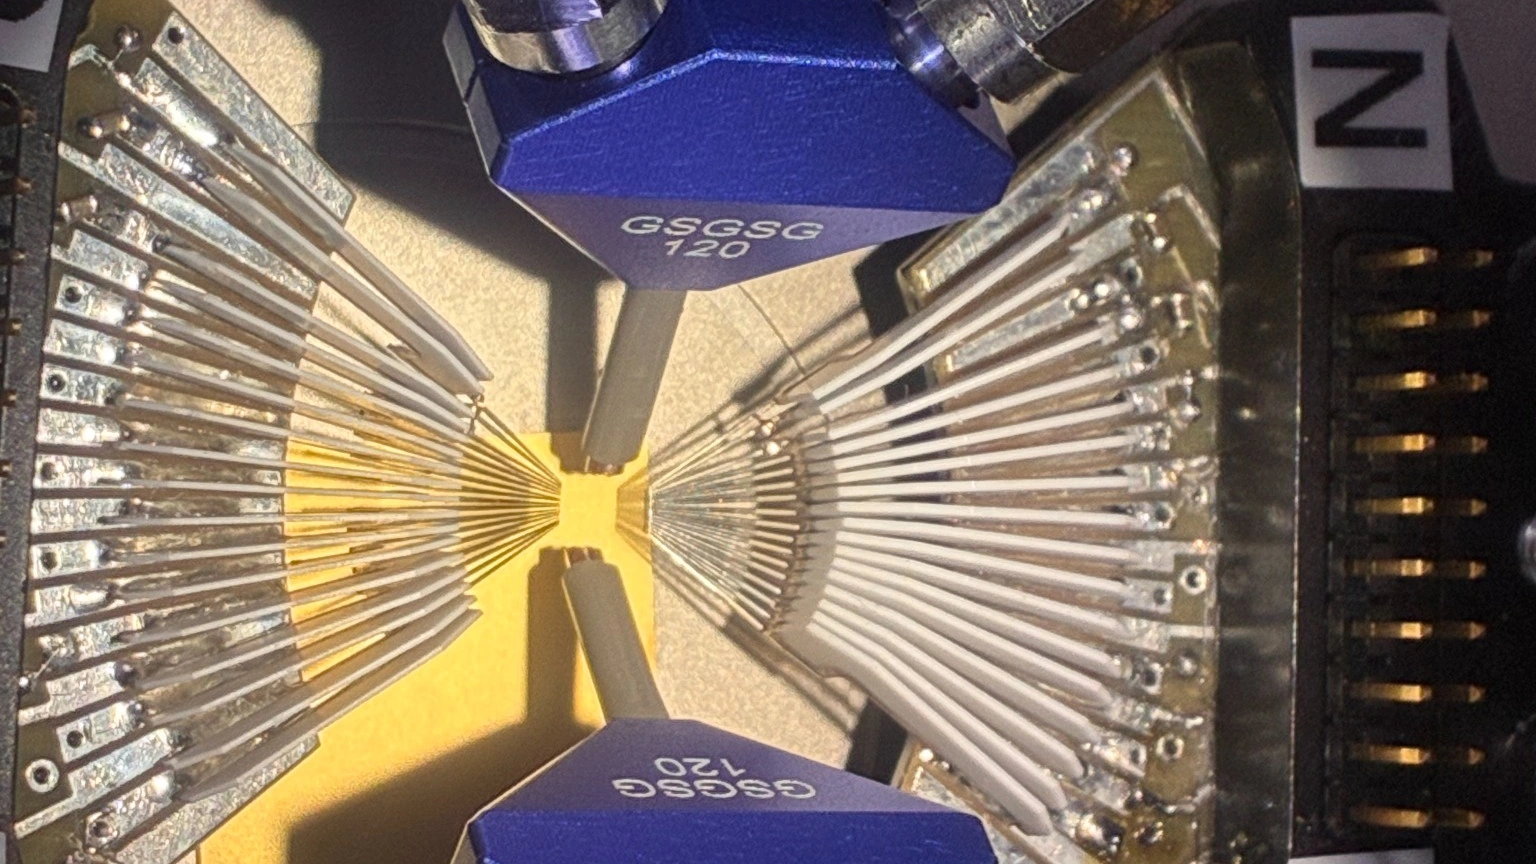
Engineer’s Selection Problem:
A probe can be rated to 67GHz and still be the wrong choice if the pitch, pad geometry, cable path, or calibration plane does not fit the DUT. For high-speed differential measurements, the probe is part of the measurement setup — not just an accessory.
Selecting a 67GHz GSSG probe should not start with frequency alone. For high-speed SerDes, PAM4, AI hardware validation boards, package coupons, and PCB-level differential structures, the right probe is the one that fits the actual DUT layout and measurement workflow.
If the probe pitch does not match the pads, the contact pattern does not match the differential layout, or the calibration plane stays too far from the probe tip, the measured SDD11 / SDD21 result may reflect the setup instead of the DUT.
Start with the DUT pad layout, then select the probe. Frequency range matters, but pitch, GSSG / GSGSG geometry, probe station access, cable routing, calibration method, and measured SDD11 / SDD21 data determine whether the probe fits the real measurement task.

Start with the DUT Pad Layout, Not Frequency
The first question is not “What is the highest frequency available?” The first question is “What does the DUT pad layout look like?”
A 67GHz probe will not solve a layout mismatch. If the DUT does not provide a suitable landing area, if the pad pitch is wrong, or if nearby components block the approach angle, the measurement may become mechanically unstable before the RF performance even matters.
Check the DUT Layout First
- Is the pad geometry GSSG, GSGSG, or another layout?
- What is the required center-to-center pitch?
- Are the pads large enough for repeatable touchdown?
- What is the pad material and surface condition?
- Is there enough clearance around packages, connectors, or nearby components?
- Was the structure designed for direct probing or for a fixture?
If the pad layout is not suitable for direct probing, a fixture, test coupon redesign, or different probe geometry may be required. For a deeper discussion of pitch mismatch and fixture-transition problems, see our article on why large-pitch GSSG probing matters in high-speed PCB and AI chip validation.
Step 1: Confirm GSSG or GSGSG Geometry
A GSSG probe uses a ground-signal-signal-ground contact pattern. It is commonly used for differential measurements where the DUT has a balanced differential pad structure.
A GSGSG probe adds a center ground between the two signal contacts. This can be useful when the DUT layout requires additional isolation or when crosstalk control is more important.
Practical Geometry Check
| DUT Layout | Probe Direction | Engineering Note |
| G-S-S-G | Use GSSG | Common for balanced differential pads and mixed-mode S-parameter work. |
| G-S-G-S-G | Consider GSGSG | Useful when the DUT includes a center ground or stronger signal isolation is required. |
| Non-standard layout | Request review | A custom pitch or different probing approach may be needed. |
Do not choose GSGSG only because it looks more robust. The contact pattern must match the DUT. If the probe geometry does not match the pads, the measurement can become mechanically difficult and electrically misleading.
GSGSG does not automatically improve every differential measurement. If the DUT pad layout is GSSG, forcing a GSGSG probe may create contact mismatch instead of improving isolation.
Step 2: Match Probe Pitch to the DUT Pads
Pitch mismatch is one of the most common selection mistakes. If the DUT uses 500µm, 800µm, 1000µm, or another custom pitch, a standard small-pitch wafer probe may not land correctly.
Engineers may then add transition boards, soldered coaxial cables, SMA launches, or temporary fixtures. These workarounds can establish contact, but they also become part of the result.
Common Selection Mistake
A probe may touch the DUT but still be the wrong choice if the pitch is forced, the landing position is unstable, or the contact marks fall outside the intended pad area.
Example: A Common Wrong Selection
A board uses 800µm differential pads, but the engineer selects a smaller standard-pitch probe because the frequency rating is correct. The probe may touch the board, but the contact lands near the pad edge, causing unstable SDD11 and poor touchdown repeatability. In this case, pitch matching is more important than simply choosing the highest-frequency probe.
Pitch Details to Confirm
- Required pitch
- Pitch tolerance
- Pad-to-pad spacing
- Whether pitch is measured center-to-center
- Whether the DUT uses a standard or custom layout
- Whether the landing area supports repeatable contact
For large-pitch validation boards or package coupons, a custom-pitch GSSG configuration may be more appropriate than forcing the DUT to fit a standard probe.
Step 3: Check Frequency Range and Connector Path
Frequency range still matters, but it should be checked after the physical layout is understood. For 112G SerDes, PAM4 validation, high-speed PCB channels, and package transition work, engineers may need bandwidth up to 67GHz depending on the measurement objective.
The probe is only one part of the RF path. A 67GHz probe used with poor cable routing, unsuitable adapters, or unstable fixtures may not deliver useful 67GHz measurement confidence.
Review the Complete RF Path
- Probe tip
- Probe body
- RF connector
- RF cable assembly
- Adapter
- VNA port
- Calibration substrate
- DUT launch or pad structure
This is why connector type and cable path should be reviewed together with the probe. For the rest of the test chain, engineers may also need suitable RF cable assemblies, adapters, and calibration accessories.
Step 4: Consider Probe Station, Positioner, and Cable Routing
A probe that fits the DUT on paper may still be difficult to use in the actual test setup. Dense boards often create mechanical problems before they create electrical ones.
A probe that looks correct in a drawing can still fail in the lab if the cable cannot move freely, the board cannot be held flat, or the probe station cannot repeat the same landing position.
Mechanical Setup Questions
- Is the probe station or positioner compatible?
- Is the available approach angle suitable?
- Can the cable bend without stressing the probe or DUT?
- Is there enough clearance around the package or connector?
- Can the board or coupon be fixed securely?
- Will repeated touchdowns be required during debug?
For dense AI validation boards and SerDes test vehicles, cable routing can become a real constraint. A 45-degree connector angle may help keep the cable path practical, but it still needs to be checked against the probe station and DUT layout.
Step 5: Plan Calibration at the Probe Tip
At high frequency, calibration cannot be treated as an afterthought. For differential measurements, the calibration plane should be moved as close as practical to the probe tip.
If the calibration plane stays too far from the contact point, the measured SDD11 or SDD21 result may include unwanted effects from cables, adapters, fixtures, or launch structures.
The calibration method should match the probe pitch and contact geometry; otherwise the calibration structure may not represent the actual DUT probing condition.
Calibration Review Checklist
- Calibration substrate type
- Probe-tip calibration method
- SOLT, LRM, or other calibration approach
- Cable and adapter stability
- DUT access after calibration
- Whether de-embedding is required
If the calibration method is unclear, the measurement may look clean but still include setup-related errors.
Step 6: Ask for SDD11 and SDD21 Data When Available
For high-speed differential validation, catalog specifications are useful, but measured data is more useful. SDD21 helps show how much of the differential signal is transmitted through the measured path. SDD11 helps show how much energy is reflected back from the differential input.
When available, measured SDD11 and SDD21 reference data can help engineers understand whether a probe configuration is suitable for the intended validation task.
Engineering Note
Measured data should be reviewed as part of the complete setup. A good probe curve does not remove the need to check pad pitch, cable movement, calibration plane, and touchdown repeatability.
Step 7: Do Not Select by Probe Model Alone
A model number is not enough to confirm suitability. Before selection, engineers should define the measurement environment clearly.
Define the Measurement Environment
- What is the DUT?
- What is the pad pitch?
- Is the layout GSSG or GSGSG?
- What is the target frequency range?
- What probe station or positioner will be used?
- How will the probe be calibrated?
- What cable and adapter path will connect to the VNA?
- Is measured SDD11 / SDD21 data needed?
This information helps determine whether a standard probe configuration is suitable or whether a custom pitch configuration is required.
Selection Table: What to Check Before Ordering
| What to Check | Why It Matters | What to Provide |
| DUT pad layout | Determines whether GSSG, GSGSG, or another geometry is required. | Pad layout drawing or board photo |
| Probe pitch | Prevents contact mismatch and unnecessary transitions. | Required pitch, preferably center-to-center |
| Frequency range | Determines probe, connector, cable, and VNA path requirements. | Target frequency and measurement objective |
| DUT type | Affects access angle, fixture need, and calibration method. | Wafer, PCB, package coupon, or validation board |
| Probe station setup | Determines mechanical compatibility and touchdown repeatability. | Probe station / positioner model |
| Calibration method | Affects measurement confidence at high frequency. | Calibration substrate and method |
| RF path | Cable and adapter choices can affect the result. | Cable length, connector type, adapter requirements |
| Measured data need | Helps evaluate engineering confidence before purchase. | SDD11 / SDD21 request if needed |
What to Send for Engineering Recommendation
To recommend the correct 67GHz GSSG probe configuration, send the actual DUT conditions rather than only the target frequency.
Send These Details
- DUT pad pitch
- Pad layout drawing or close-up board photo
- DUT type: wafer, PCB, package coupon, or validation board
- Target frequency range
- GSSG or GSGSG geometry
- Probe station or positioner model
- Required connector and cable setup
- Calibration substrate or calibration method
- Whether SDD11 / SDD21 data is needed for review
This avoids the most common selection problem: choosing a high-frequency probe that does not fit the actual DUT.
How VST-67G-GSSG Fits the Selection Flow
The Vinstronics VST-67G-GSSG supports DC–67GHz differential probing with GSSG tip configuration, 1.85mm female RF interface, 45-degree connector angle, and pitch options from 100µm to 1250µm.
Custom pitch configurations are available for non-standard DUT layouts, making it suitable for AI hardware validation boards, high-speed SerDes test boards, PAM4 channels, package coupons, PCB-level differential structures, and mmWave differential measurement setups.
For engineers who need a product and application overview, see the Vinstronics article on the 67GHz large-pitch GSSG probe for AI chip and SerDes test boards.
Conclusion
A 67GHz GSSG probe should be selected as part of the full measurement setup, not as an isolated component.
The right choice depends on pad layout, pitch, GSSG or GSGSG geometry, frequency range, probe station access, cable routing, calibration method, and whether measured SDD11 / SDD21 data is needed.
Selection rule:
Start with the DUT pad layout, then select the probe.
FAQ
How do I choose the right GSSG probe pitch?
Start with the DUT pad layout. Confirm the required center-to-center pitch and whether the pad spacing follows a standard or custom layout.
Should I choose GSSG or GSGSG?
Choose GSSG when the DUT uses a ground-signal-signal-ground differential pad layout. Consider GSGSG when the DUT requires a center ground or stronger isolation between signal paths.
Is 67GHz always required for SerDes validation?
Not always. The required frequency range depends on the measurement objective, data rate, channel behavior, and de-embedding approach. However, 67GHz bandwidth provides useful headroom for many high-speed differential validation tasks.
Why is probe-tip calibration important?
Probe-tip calibration helps move the calibration plane close to the contact point, reducing unwanted effects from cables, adapters, fixtures, and launch structures.
What should I send before requesting a custom GSSG probe?
Send the pad pitch, DUT layout or board photo, DUT type, target frequency, probe station model, connector/cable requirements, and calibration constraints.
Need Help Selecting a 67GHz GSSG Probe?
Send your DUT pad layout, board photo, target frequency range, and probe station setup. Vinstronics engineers can help review the correct GSSG pitch, connector path, and probe configuration for your measurement setup.
Send Pad Layout for Probe Selection Review
View VST-67G-GSSG